Have you gone out and bought an Aeropress because you heard great reviews about it? And now you can’t figure out how to make decent coffee with it?
Don’t worry, in this article, I will go over how to make a great cup of coffee, using the Aeropress.
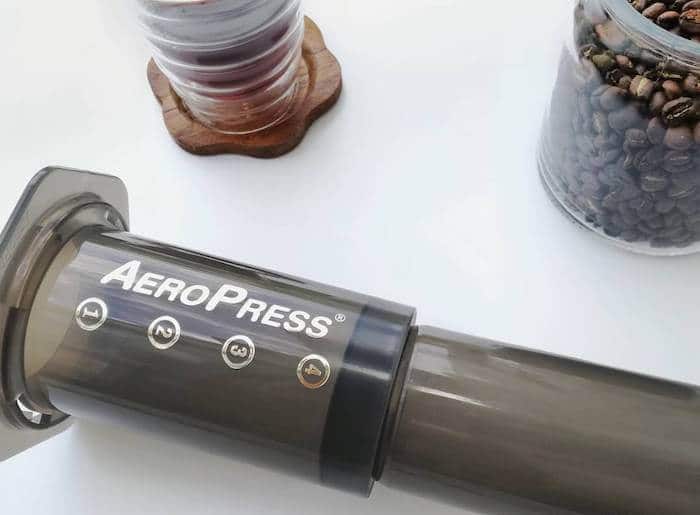
Getting the Most Out of Your Aeropress
Aeropress is a smart invention with great potential. With these small tricks, you get the most out of the coffee pump.
Aeropress has, in many ways, become a phenomenon in the coffee world.
It is only a little over a decade ago that the brewer was born, but already it is an institution in and of itself.
There are fun hashtags on Instagram like #milehighaeropressclub that are surprisingly cool. There are contests that allow coffee enthusiasts to hang out and blend casually.
It goes without saying that all coffee people with respect for their beverage should brew a decent Aeropress.
For me, though, this brewing technique has always been a weak point. I would go as far as to say, a frustration.
Wherever I wanted, I couldn’t get proper coffee out of it. Even if I made a reliable cup, the same coffee would taste significantly better than pour-over, with less effort.

New Aeropress, New Beginning
I had actually given away my Aeropress and written it off as a proper brewing method but recently I came across a good offer on the new edition.
The new model has a couple of benefits. It is a bit lighter, gets fewer scratches due to a slight design change, and in my opinion, it is also an aesthetic-looking machine with a lighter color and golden logo.
A new Aeropress meant a fresh start for me. And this time, I did things differently.
Instead of just being content and following the typical instructions out there, I’ve been trying to deconstruct techniques, recipes, and practices from scratch.
I have experimented and studied everything from extraction to water and brewing ratios.
I can now proudly say that Aeropress has finished playing Fifth Violin in my coffee arsenal.
My new approach provides body, sweetness, and acidity and is a valid alternative to my beloved pour-over.
Do you also miss any X factor from your Aeropress? So try implementing some of the following techniques in your brewing.
An Aeropress seems simple on the surface, but I can guarantee that the road to success lies in the small details.
1. Pump Gently
Most people who get an Aeropress in their hands instinctively pump hard and fast. I myself have been guilty of stamping with most of my body weight to get the right 50 bar pressure.
It makes sense because, in the espresso world, we are instructed that pressure is essential to the extraction. But just with Aeropress, it is actually the opposite.
If you study the liquid from a hard-pumped Aeropress in a transparent glass, you can see that it gets a kind of muddy expression. Typically there will be some unpleasant taste in the cup and a strange mouthfeel.
After all my experiments, it has been found that the most important component of getting a balanced cup is to pump gently. Also somewhat gentler than consensus. It should take 60-120 seconds to run the pump to the bottom.
You will immediately be able to taste the difference, and you will even see the difference. In a clear glass, the coffee will suddenly appear differently clear – like a typical pour-over with no impure turbidity.
2: Mix, Cool, and Oxygenate
Over the years, I have talked to many who, like myself, have never really made Aeropress work.
Personally, I think one of the reasons is that most people brew directly into the same cup from which they drink the coffee. What you should do instead is brew in a pot of coffee – often called a range server.
Why? Several things happen when you brew in a separate pitcher. First, you get the liquid mixed more thoroughly.
If you brew in a cup, the most concentrated part of the coffee will be at the bottom, and the first mouthfuls will taste under-extracted and flat.
Another argument for brewing in a separate jug is that you get the liquid-cooled down faster.
Coffee is best at a temperature between 50 and 60 degrees, and it hits it much faster by not drinking the brewing cup.
The third reason is a bit controversial, but actually coffee benefits from oxygenating a little. I usually pour the coffee back and forth between the cup and range server two or three times to oxygenate it.
It is unclear exactly why it works (the mechanism is probably different from wine), but acclaimed coffee experts report that light oxygenation is a plus.
One explanation may be that it raises the PH level slightly in the cup.
3. Water
Water is not just an ingredient in coffee. Water is also part of a process where it extracts flavors from the coffee. Therefore, the water must have the right composition of minerals when it comes to coffee brewing.
Unfortunately, Danish tap water is not very suitable for coffee brewing. A large amount of lime neutralizes the most delicate and aromatic flavors, making the coffee taste flat.
Instead, use a relatively soft foreign mineral water for coffee brewing – not quite as tough as Perrier and San Pellegrino.
It is even better to make your own coffee water by using reverse osmosis water and adding minerals such as lime and magnesium.
I have written a longer article on the subject which you can read here.
4. Use Two Filters
Do you miss even more clarity in the cup? Then try brewing with two paper filters.
It sounds a bit crazy, but it is quite simple in practice and has a good effect. Where you usually put one paper filter, you use two.
I’ve only used two filters for a short time, but have been really excited about it ever since I first tried the technique.
With two filters, it is slightly more economical to throw them out after each brew. Instead, reuse the filters. It’s surprisingly easy once you’re used to it.
When I have finished brewing, I usually keep the piston firmly in place with good pressure. Then I tear back slightly, unscrew the capsule. Then it is easy to remove the paper filters, stamp the coffee puck into the compost.
Clean the paper filters under the tap and allow them to dry on the rubber plunger, so they do not lose shape.
5. Cleaning
Aeropress’s godfather Allan Adler is an amazing inventor, but he’s a barely capable barista.
His basic idea was to use the Aeropress as a kind of mini-espresso machine. That vision has long since been shrunk by the users out there.
However, there is still another Adler’s thesis out there. One of them is that Aeropress is self-cleaning. However, we must strongly oppose this. If you do not clean your equipment, your coffee will quickly taste poor.
Old rancid coffee oil is simply devastating for a good cup of coffee, so do yourself a favor and rinse and scrub after use. Separate the whole pump periodically and allow it to bathe in warm water with a few teaspoons of baking soda (also a good remedy for electric kettles with added flavor).
Take special care to remove the rubber seal from the pump – otherwise, there will be nasty rubbish of rancid coffee underneath.
6. Don’t be Afraid of Long Brew
Most recipes for Aeropress out there operate with a brewing time of 2-3 minutes and a coffee/water ratio of 1:14.
But I have had fascinating results by experimenting with both parameters. If you go up to a 1:18 ratio, you can brew for up to a quarter and get really rich and exciting results out of it. At the same time, it is also a bit more economical in coffee consumption.
You can use both inverted or normally flipped Aeropress.
The normal method’s trick is to make a vacuum seal by pulling up the pump right after it has been inserted. This way, you avoid the coffee running out. Allow the coffee to draw between 8 and 15 minutes in the Aeropress.
Remember to stir the coffee after four minutes so that the coffee settles. It works surprisingly well with certain types of coffee.
With coffee, where body, mouthfeel, and deeper notes are in focus – typically the middle grille – one should not be afraid to try a long, long draw time.
However, with lightly roasted and sour coffee, I have become really fond of Cristian Scigliano’s recipe.
After all, Cristian brews for The Coffee Collective daily, so you almost have to assume that this recipe fits perfectly with third-wave roasts.
- Use 16 grams of coffee for 230 grams of water (93 degrees)
- Bloom with 40 grams of water for 15 seconds
- Pour the rest on in 25 seconds.
- Wait for a minute.
- Then, slowly press the plunger to the bottom till you can hear the air seeping out.
7. Brilliant for Cold-Brew
I’m not a big fan of cold brew but there are situations where it can be convenient to make.
This is especially true if you are traveling and cannot get boiling water the next morning. Maybe you are on a long bus journey. In that situation, it is brilliant to make a bottle of cold brew the day inside a plastic bottle.
A pour-over filter gets quickly blocked if you try to filter cold-brew, but an Aeropress manages it as easily as nothing.
Cold-brew is often good to brew in a 1:10 ratio, but rather brew a little too concentrated, so you can always mix with ice, water or milk afterward.
The Bottomline
Aeropress differs from methods such as pour-over and plunger by having far more parameters to play with.
It seems simple on the surface, but in reality, the brewer is much more complicated than the other common ways of making black coffee.
It’s not just about the water/coffee ratio, the ground degree, and the water temperature but also much more.
Therefore, it is unfortunate that Aeropress is just being sold because it is a speedy and simple way to make coffee. This is far from reality.
I hope you can use some of the above techniques to get much more out of your Aeropress than you currently are.
Remember, to adjust only one parameter at a time when experimenting with your brewing. However, I would still urge you to try very different approaches, as they may all be justified.
Enjoy experimenting!